1
Visit Claude in your browser
Go to claude.ai
2
Open Settings -> Connectors
Click on your avatar in the lower left to open the menu and then choose Settings, and then select the Connectors tab.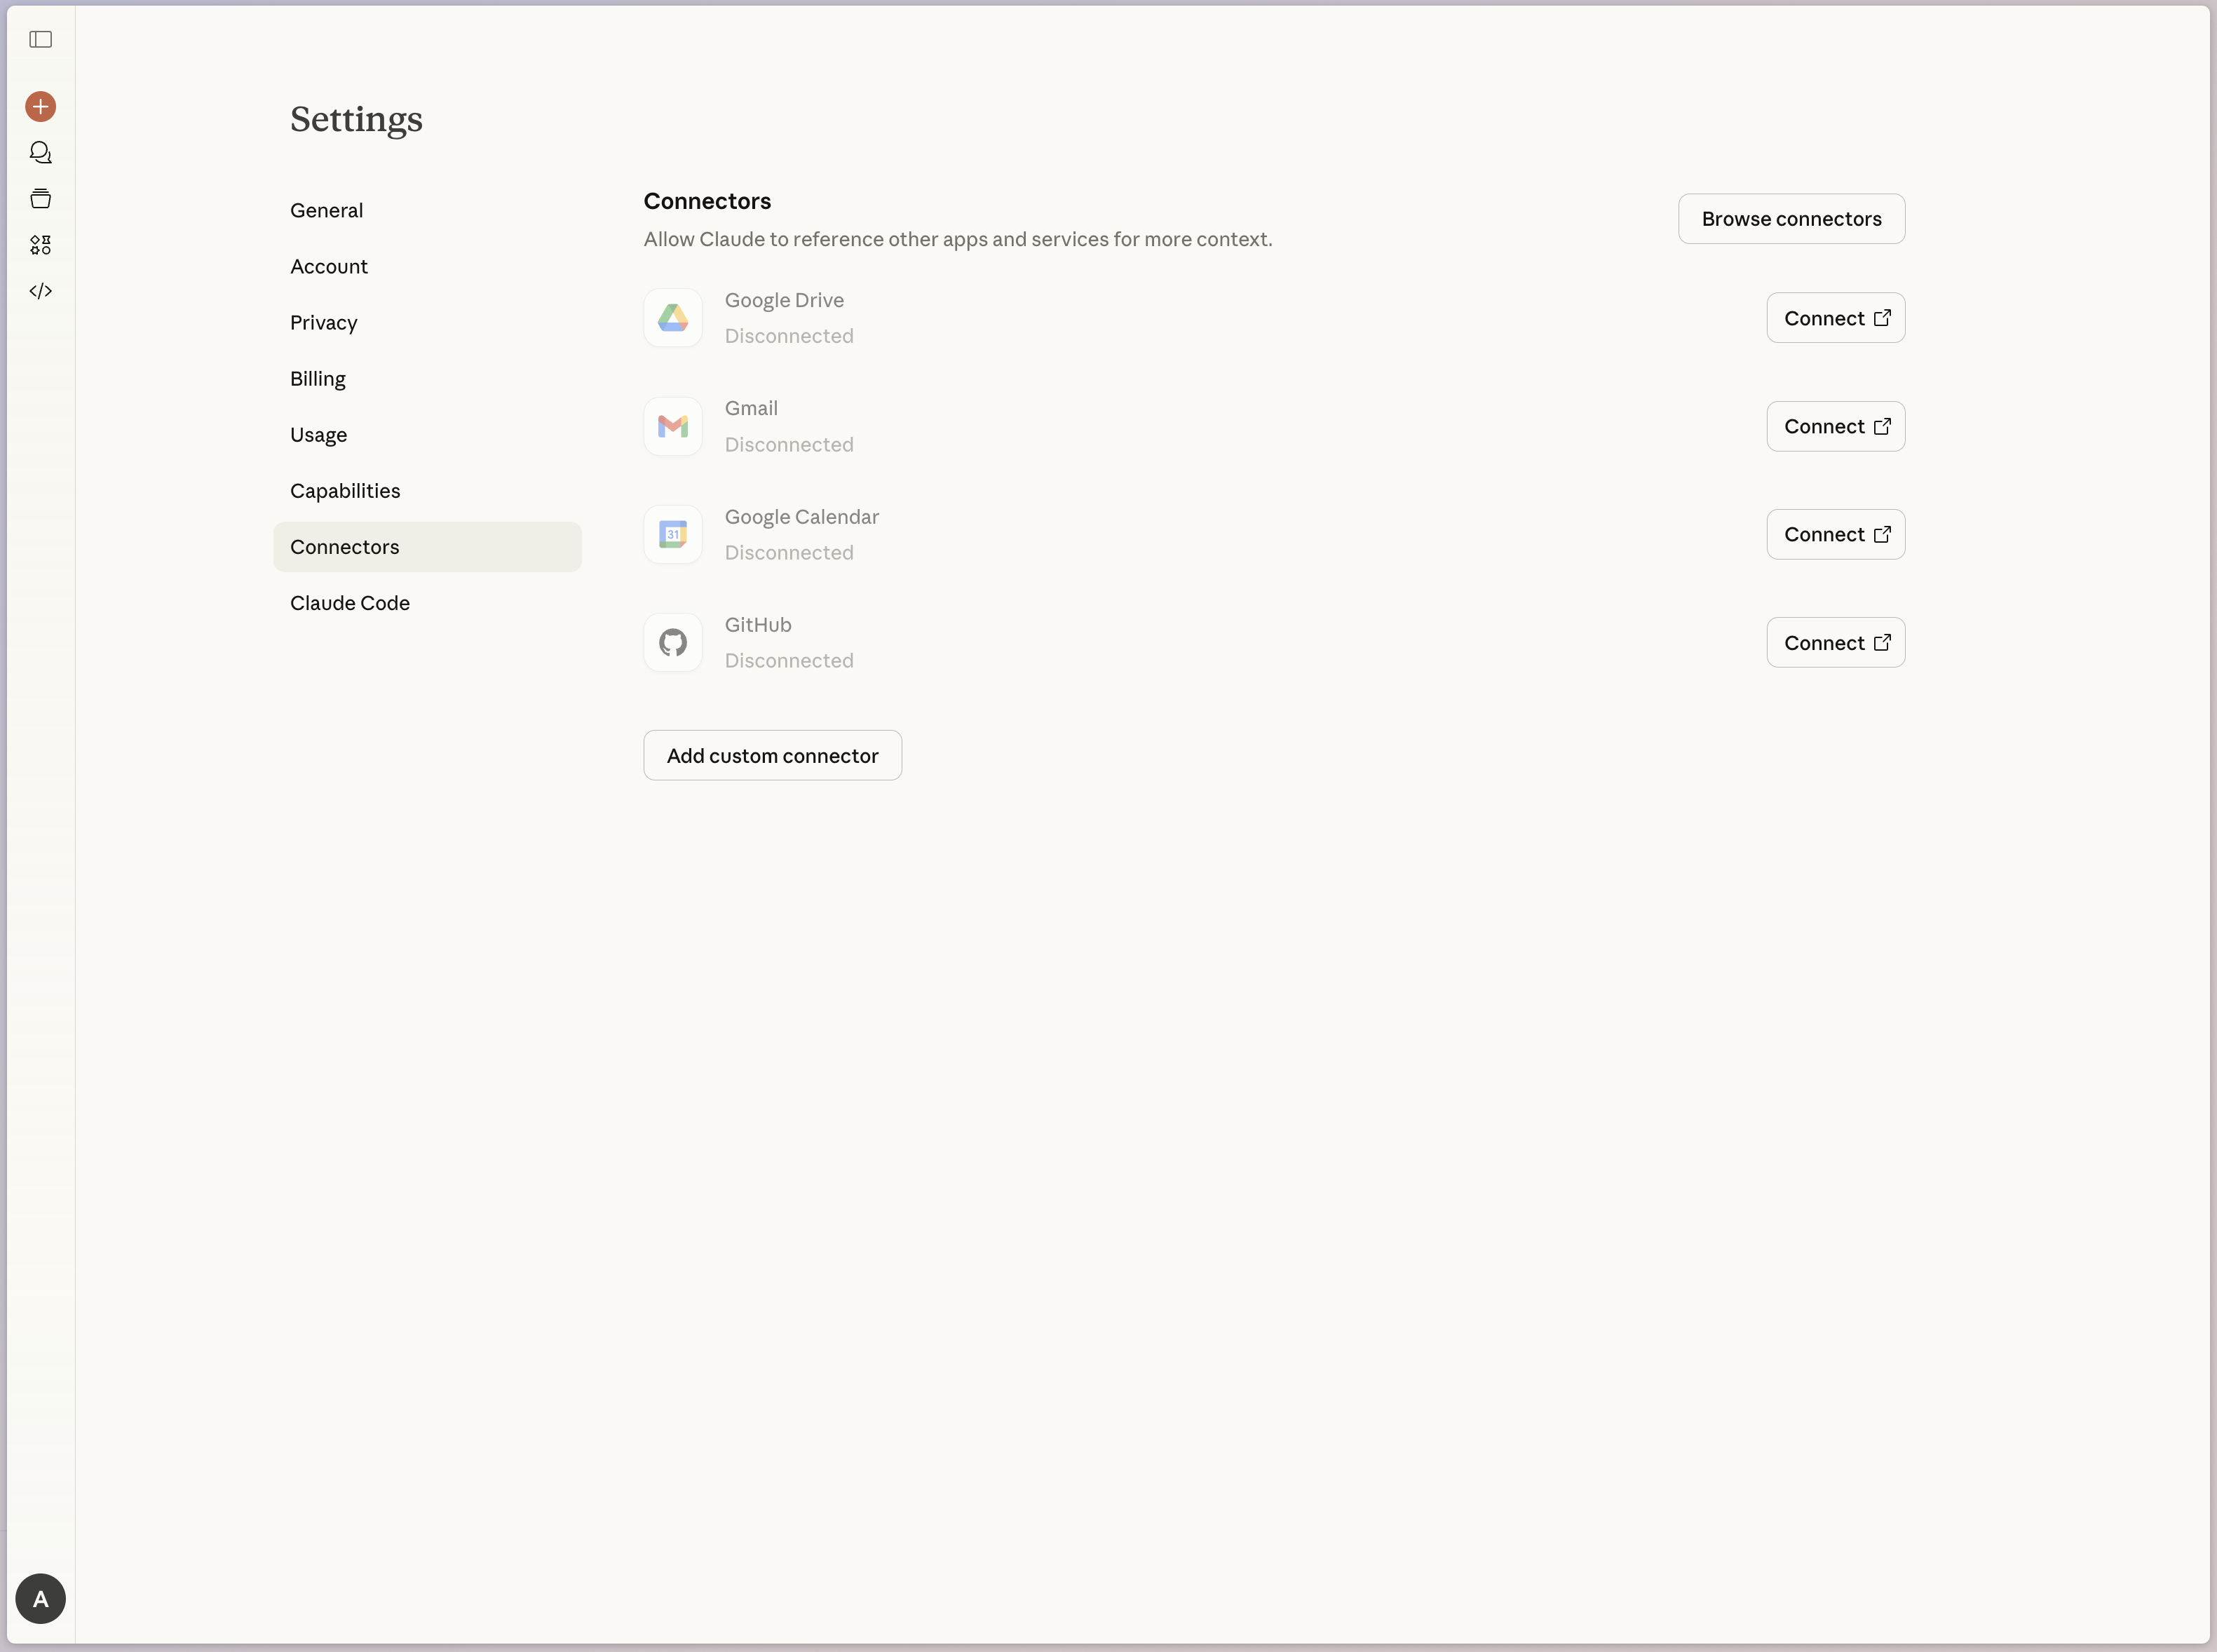
3
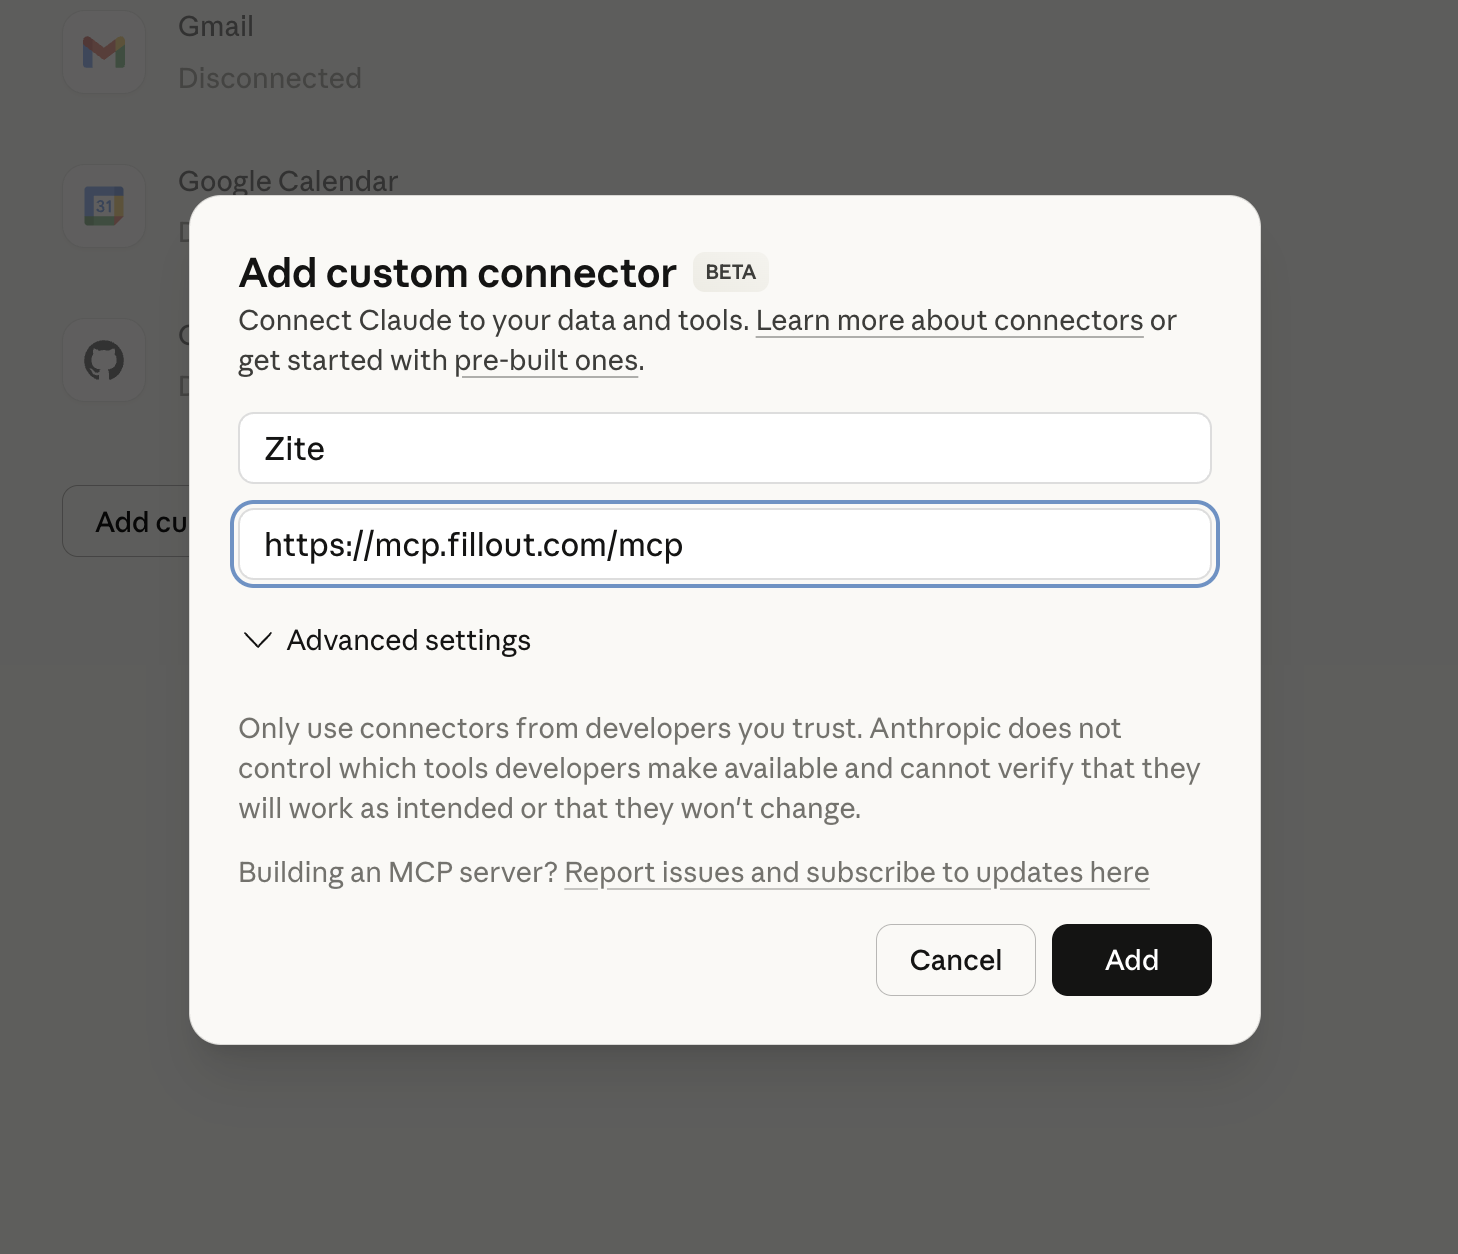
Create a custom connector
Click the “Add custom connector” button and enter the following details:
- Name: Zite
-
Remote MCP or server URL: https://mcp.fillout.com/mcp
4
Start the authentication process
Your custom connector will have been created at this point, but you need to connect it before you can use it. Click the “Connect”
button to get started.
5
Authorize the connection
Claude will send you over to Zite with this authorization screen: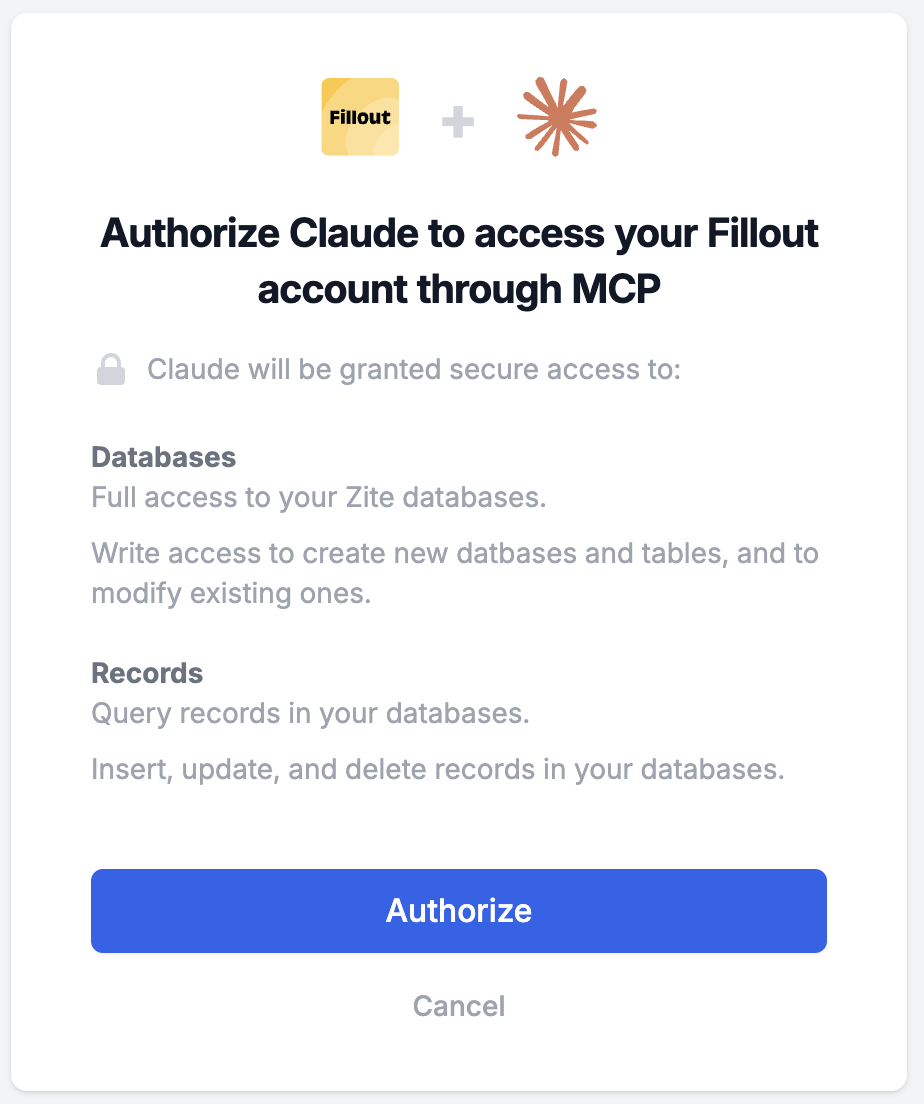
6
Optional: change default permissions
Clicking the “Configure” button next to your connector gives you options for setting the default permission level for Zite MCP.
By default, Claude must ask permission before executing any of the tools, but you can change the permissions here so it doesn’t
have to ask or to block specific operations.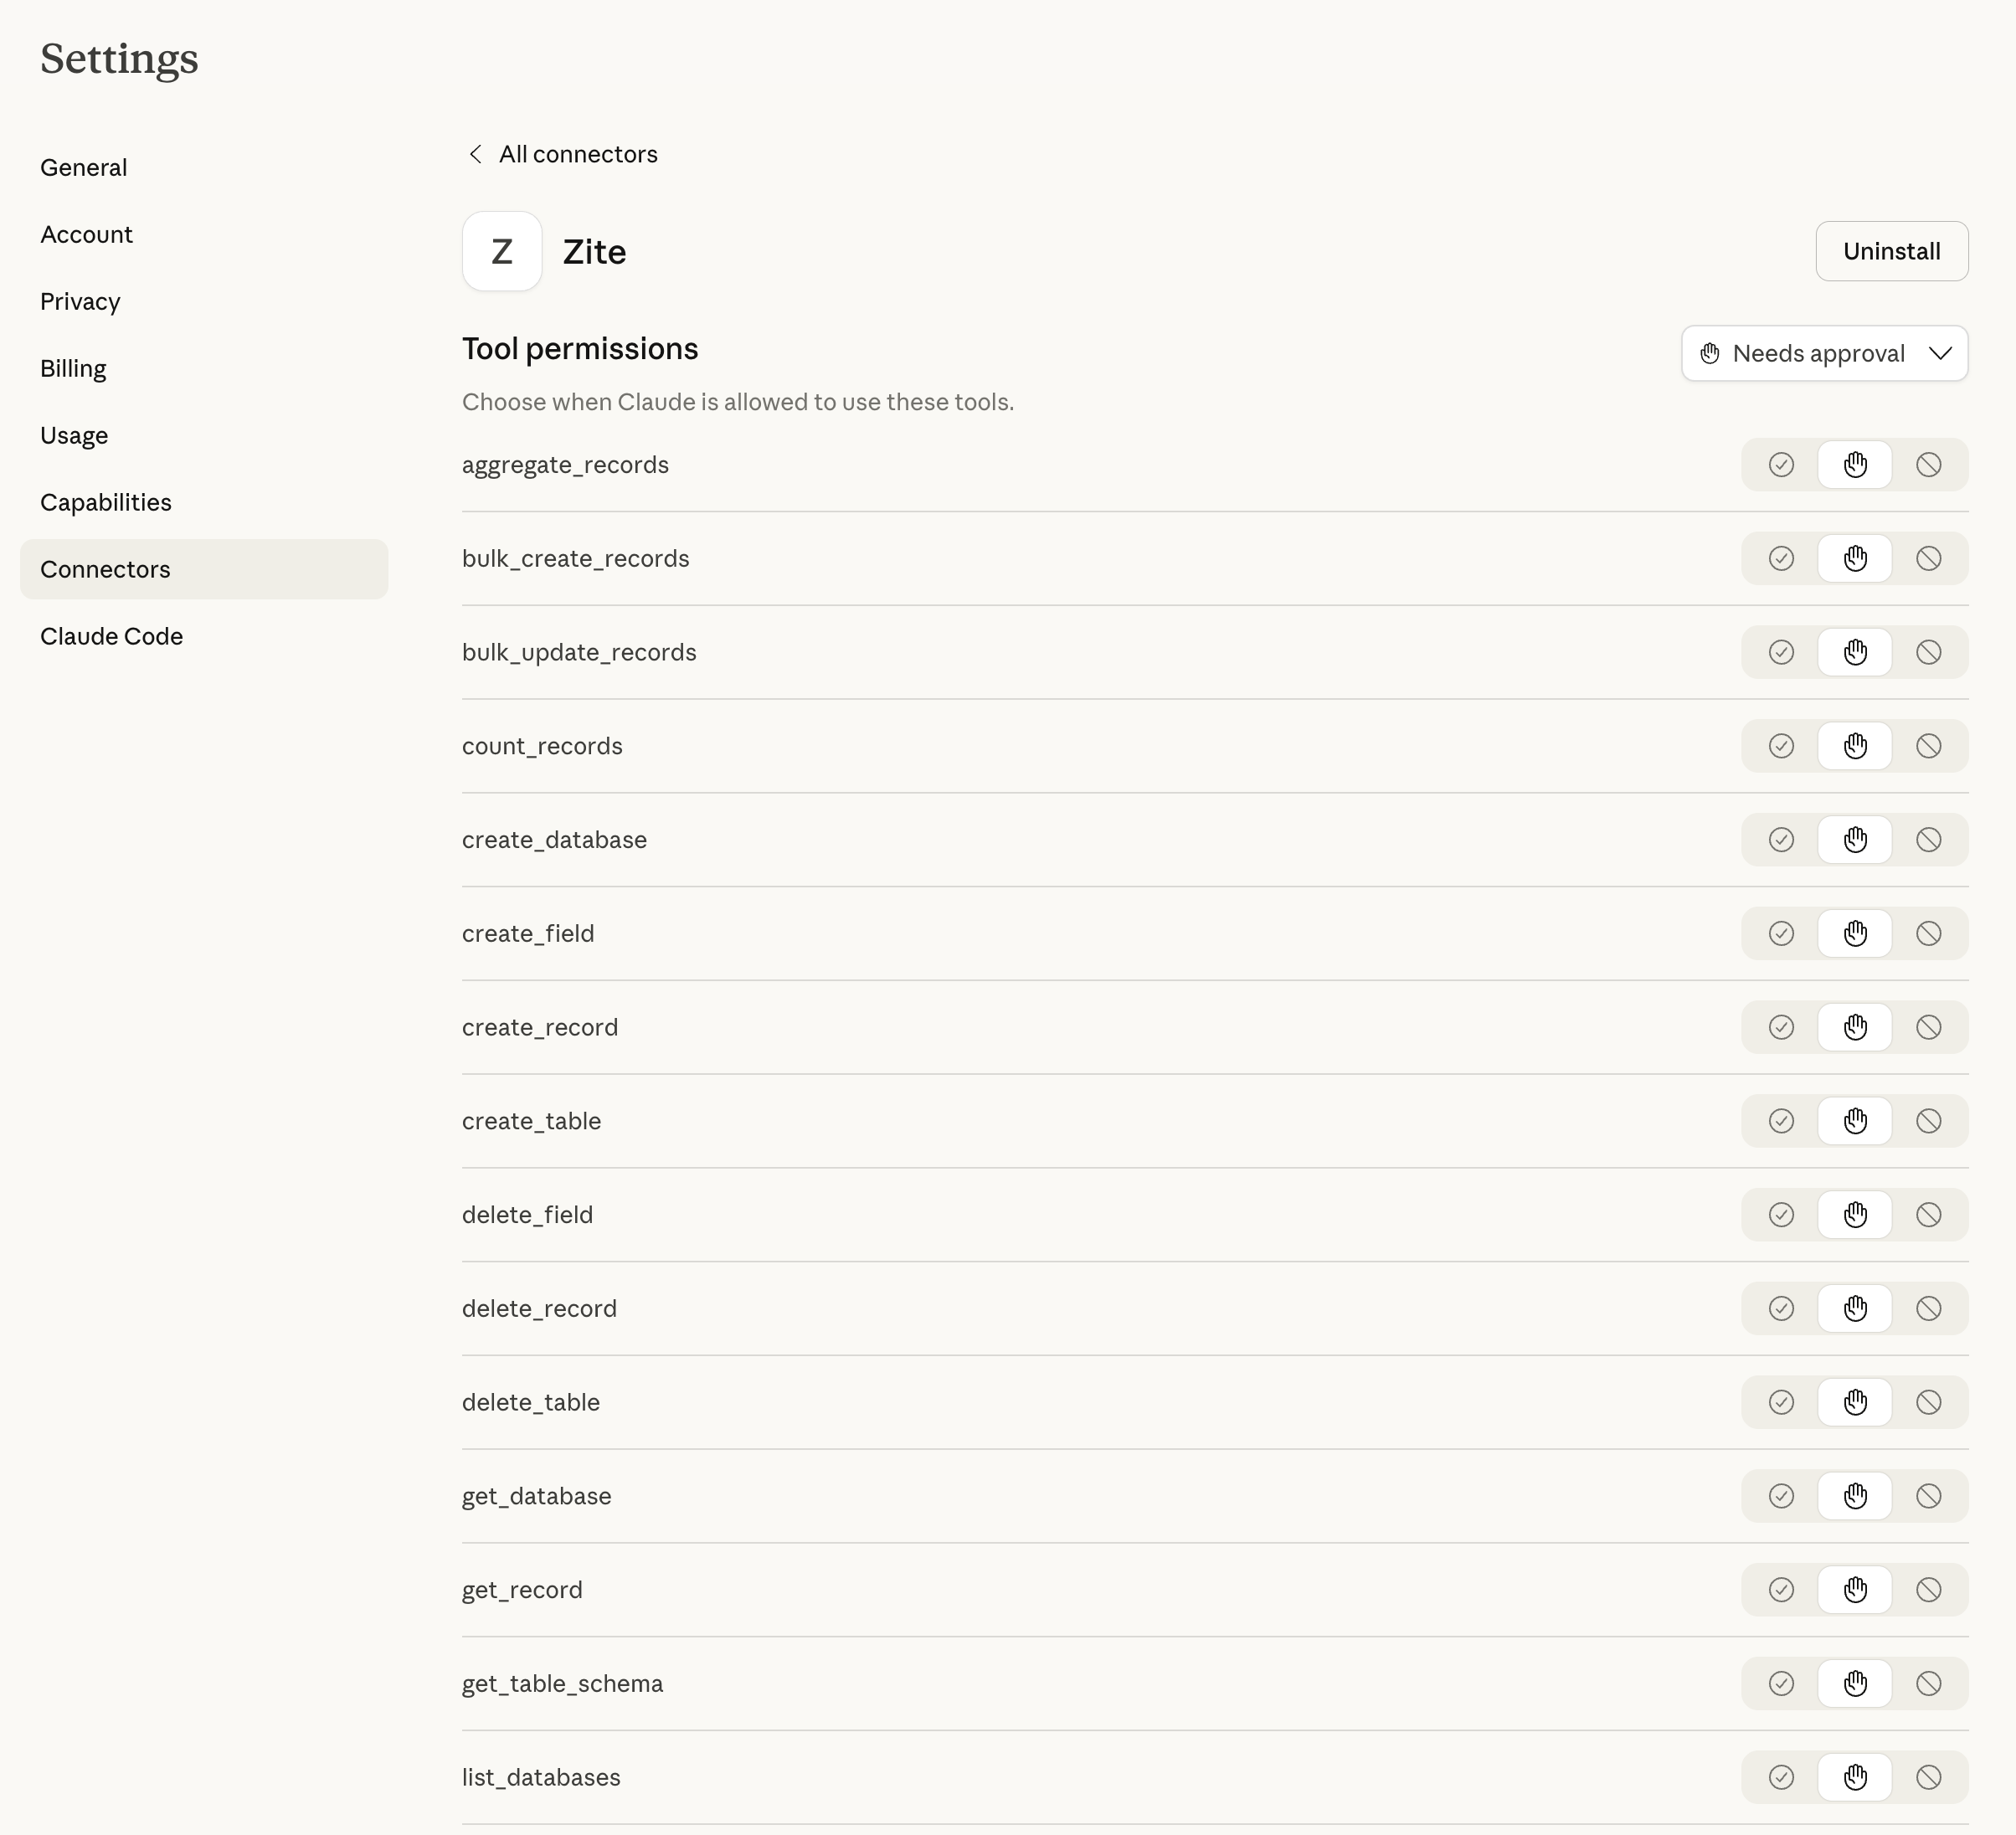
7
Start chatting
You’re all set. At this point you can head back to Claude’s chat interface and start accessing your Zite data.